
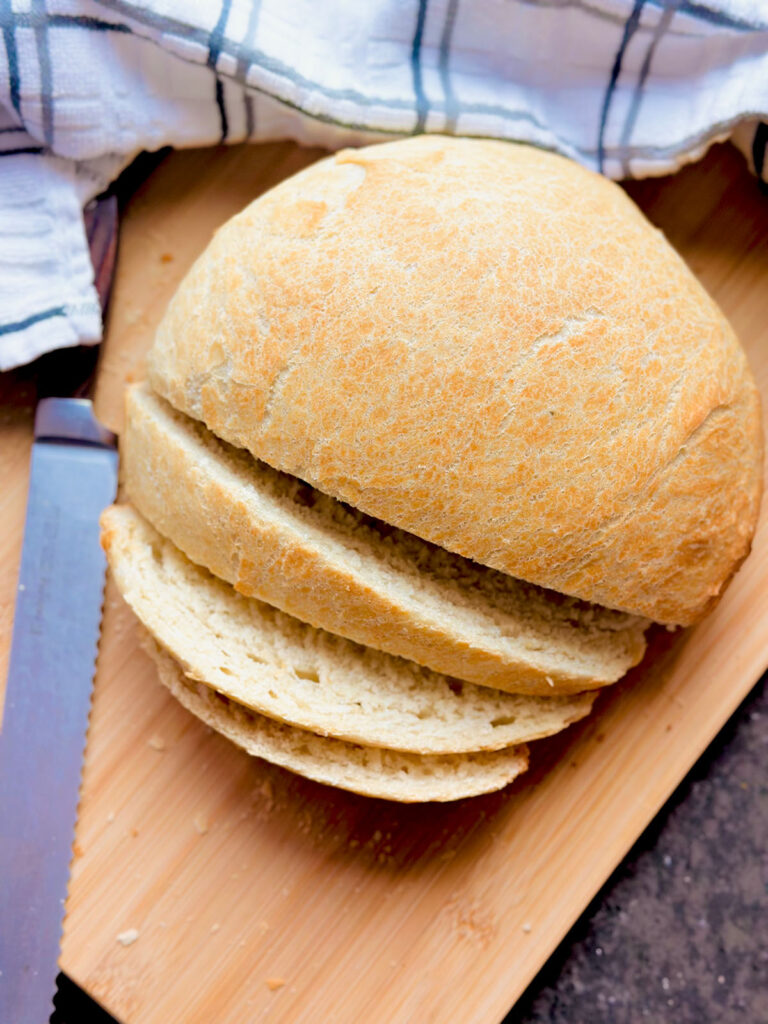
This Artisan-Bakery Style Bread recipe is as simple as it gets! Made with basic pantry ingredients, this homemade fresh bread made easy requires no eggs, milk, or butter. The dough is easy to prepare, so you can enjoy fresh bread the same day!
Today, I’ll be sharing my tasty and simple Artisan bread recipe! I love this recipe so much that there’s no need to wait overnight for it to rise—you can enjoy it the same day! Whether you’re new to bread-making or experienced, this recipe is super easy—it’s foolproof! I’ve made this recipe countless times and I’ve finally perfected the ingredients to my liking. I can’t wait to share it with you!
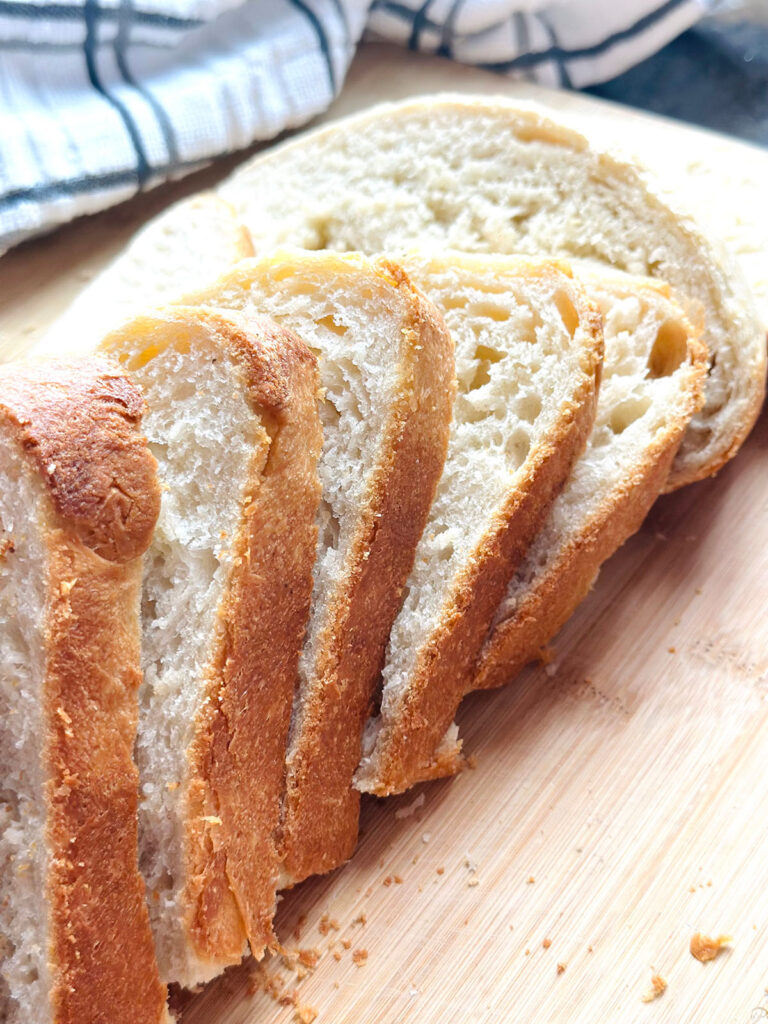
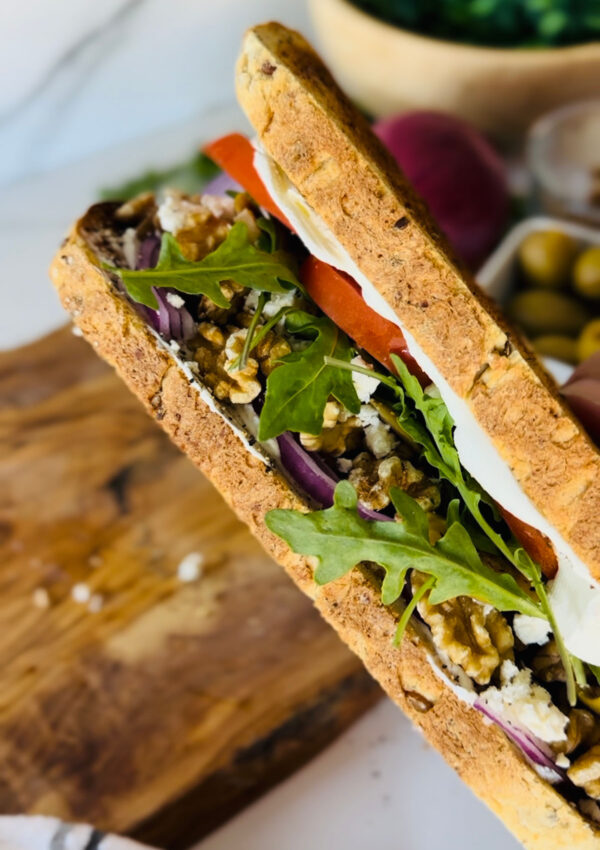
Listen, I don’t want to confuse you—this bread isn’t the standard sandwich-sliced type. It has a hearty, thick, and chewy texture, yet it’s also airy (depending on how long you let your dough ferment). It’s perfect for dipping into seasoned oil, or you can make a delicious panini sandwich! However you choose to serve this bread, it tastes great either way. The outer crust is crispy, while the inside remains moist.
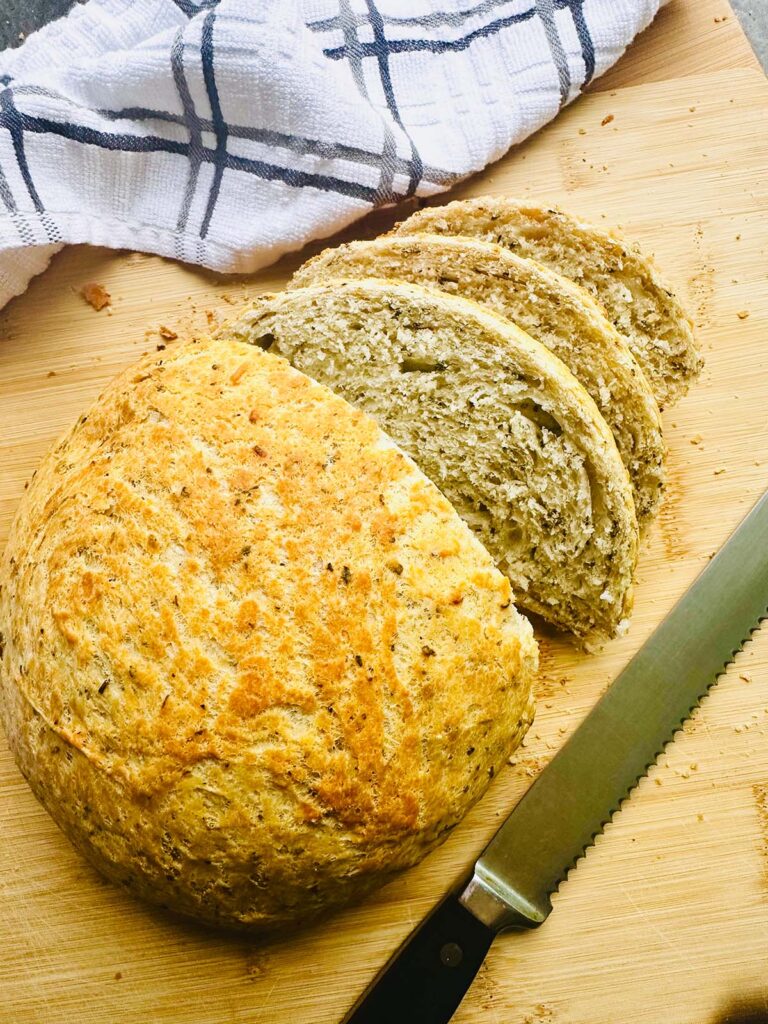
I’ve hosted and entertained guests with this bread, and everyone who has tried it has said they couldn’t get over how tasty it is! The best part is, you can add any type of herb or spice to flavor it up. I’ve tried adding sweet basil, grated fresh garlic, and grated parmesan cheese. Just be sure to add your herbs and extras and give them a good mix before adding the wet ingredients. Let me tell you, it turned out great!
Shop Items from this Recipe!
OTHER GREAT ALTERNATIVES FOR YOUR BREAD
I love experimenting with flavors! One day, I decided to add olives, freshly grated garlic, and feta cheese to my dough, and it turned out amazing! Encouraged by the result, I kept experimenting. Next, I tried adding fresh garlic, Italian seasoning, and sun-dried tomatoes, and that turned out amazing as well! As I continued to play around with different ingredients, I realized the possibilities were endless, and I couldn’t decide which combination was my favorite! I’ve also used this dough to make pizza, and it turns out amazing every time!
Let me know if you’d like any further tweaks!
This post contains referral links to products we have used or similar to the items used in this recipe. Galore Of Flavors earns a small commission on these links at no cost. You can find more products like these on our “Shop My Favorites” on our homepage! ♡
IN THIS POST: EVERYTHING YOU NEED TO KNOW TO MAKE THE PERFECT HOMEMADE BREAD
- OTHER GREAT ALTERNATIVES FOR YOUR BREAD
- 🍴INGREDIENTS YOU’LL NEED TO MAKE THESE
- DO YOU NEED A MIXER, OR CAN YOU KNEAD BREAD BY HAND?
- STEPS TO MAKE THIS RECIPE!
- PREFER TO WATCH STEP-BY-STEP RECIPE VIDEO INSTEAD OF READING?
- JUMP TO RECIPE CARD
🍴INGREDIENTS YOU’LL NEED TO MAKE THESE
Here is a preview of the ingredients you’ll need to make this recipe! You can find these at your local grocery store, or you can shop online. (Detailed ingredients in Recipe Card down below)
- Warm water (105° – 115° degrees)
- Bread Machine Instant Yeast – make sure the yeast is fresh (Note: To get a more chewy texture, I tried using “Pizza Crust (fast and easy) Yeast,” and it also turned out great! 🥰
- Granulated Sugar
- Salt
- Extra Virgin Olive Oil
- Flour – All-purpose flour will work, but I used King Arthur Unbleached Bread Flour. I’ve also used organic bread flour and noticed that I had to add an extra tablespoon of olive oil to smooth it out. Do NOT add too much flour, as it will make the bread too dense. The texture of your dough should be sticky to the touch and should pull away from the sides of the bowl while kneading in the mixer.
DO YOU NEED A MIXER, OR CAN YOU KNEAD BREAD BY HAND?
You don’t need special equipment or a stand mixer for this recipe. If kneading by hand, start mixing with a wooden spoon until your dough is easily able to be handled by hand. Make sure you add a bit of flour to the palms of your hands as you knead. Don’t over-flour your dough, it should be slightly sticky.
STEPS TO MAKE THIS RECIPE!
Tips before starting:
- Don’t over-flour your dough. Over-flouring your dough will create a dense texture.
- Place the dough into a well-oiled bowl and allow the dough to rest for a few hours. I usually place dough under the sun in a well-sealed, air-tight plastic wrap. Allow it to rest and do not touch while fermenting (I usually make my dough in the morning and allow it to sit all day until about 4:00 pm to start baking).
- After fermentation, no kneading is required; lightly lift the sides of the dough and release the air and remove from the bowl.
- If you want to keep dough overnight, I recommend sealing it with plastic wrap, placing a towel over the top of the bowl, and placing the bowl into another bag. Place it into the fridge overnight. The next day, remove the dough from the fridge and allow it to sit for a few hours. Once the dough has come to room temperature, fermentation will continue until you are ready to bake.
- To achieve a crunchy outer layer, keep bread in the oven a few minutes longer to achieve a golden crust.
Important Note: Be very careful while using your stone pot, it gets very HOT! Make sure to use proper heat-resistant cooking mittens when handling your stone pot while baking.
Step 1: In a stand mixer or by hand, whisk flour, yeast, sugar, salt, and oil together. While mixing, heat your water in the microwave (I usually set the water into a mug and set the microwave timer to one minute and ten seconds). Your water should measure a temperature of 105°-115° degrees.
Step 2: Gradually add your water and pour water into four portions while mixing the dough. As the mixer is running, scrape the sides of your mixing bowl and allow it to mix for 8 minutes until your dough starts to pull away from the sides of the bowl. If you see the dough isn’t pulling from the sides of the bowl, add a pinch of flour until it does (if kneading by hand, knead dough on a floured flat surface). Dough should be slightly sticky, smooth, and elastic. Form the dough into a ball and place it into an oiled bowl. Cover with plastic wrap to prevent any air flow and place under the sun or a warm setting and allow the dough to rest for at least 3-4 hours. Your dough should double in size once it’s done fermenting.


Step 3: Preheat your oven to 450° degrees. Gently grab the dough from both sides of the bowl and fold it over, making your way around with the same motion. Once the dough is detached from the sides of the bowl, transfer it to a floured surface. Continue to lightly flour your dough as you stretch and fold. Grab the sides of the dough, lift it up, and fold it under. Turn the dough 90 degrees and fold again. Then, grab the dough from one side and start rolling it inward until you reach the other side. Roll it over once more to form a ball (see the video for a demonstration of folding).
Step 4: Once formed into a ball, place about 2 tablespoons of olive oil into your stone pot or on parchment paper, and place the dough in the center. Add 1 teaspoon of water and 1/4 teaspoon of oil in a small bowl (saucer), then lightly brush the top of the bread. If you’d like to score your bread, this is the time to do it. Use a razor, knife, or the tip of a pair of scissors to make tiny cuts for a beautiful look. Place the lid over the pot and set it in your oven. Bake for 30 minutes.
Step 5: (Note: Be very careful while using your stone pot, it gets very HOT! Make sure to use proper heat-resistant cooking mittens when handling your stone pot while baking.) Once baked, remove the lid using heat-resistant oven mittens and bake for another 10 minutes. Afterward, remove the bread from the stone pot using proper heat-resistant mittens and place it on a cooling rack or cutting board for 20 minutes. Do not cut into the bread until it has cooled off. Enjoy!
PREFER TO WATCH STEP-BY-STEP RECIPE VIDEO INSTEAD OF READING?
Have any questions about this recipe, or have you tried making our recipe yet? If so, we would LOVE to hear how it turned out! You can post, tag, rate, and comment down below and on Instagram! 👇 Thank you in advance!
⭐⭐⭐⭐⭐
WRITE US A REVIEW BELOW ⬇️
We would love to hear your thoughts if you tried out our recipe! 😊
Print
Homemade Fresh Bread Made Easy
- Total Time: 4 hours 45 minutes
- Yield: 1 loaf of bread 1x
Description
Homemade Fresh Bread Made Easy!
This Artisan-Bakery Style Bread recipe is as simple as it gets! Made with basic pantry ingredients, this homemade fresh bread made easy requires no eggs, milk, or butter. The dough is easy to prepare, so you can enjoy fresh bread the same day!
Ingredients
- 1 1/2 cups Water
- 2 3/4 Teaspoons Bread Machine Instant Yeast
- 2 Teaspoons Granulated Sugar
- 2 Teaspoons Salt
- 2 Tablespoons Extra Virgin Olive Oil
- 3 cups + 3 tablespoons Flour
Instructions
- In a stand mixer or by hand, whisk flour, yeast, sugar, salt, and oil together. While mixing, heat your water to 105°-115° degrees in the microwave.
- Gradually add your water and pour water into four portions while mixing the dough. Scrape the extra flour from the sides of your mixing bowl and allow it to mix for 8 minutes until your dough starts to pull away from the sides of the bowl. Dough should be slightly sticky, smooth, and elastic. Form the dough into a ball and place it into an oiled bowl and cover with plastic wrap for 3-4 hours to ferment.
- Preheat your oven to 450° degrees. Gently grab the dough from both sides of the bowl and fold it over, making your way around with the same motion. Once the dough is detached from the sides of the bowl, transfer it to a floured surface. Continue to lightly flour your dough as you stretch and fold. Grab the sides of the dough, lift it, and fold it under. Turn the dough 90 degrees and fold again. Then, grab the dough from one side and start rolling it inward until you reach the other side. Roll it over once more to form a ball (see the video for a demonstration of folding).
- Once formed into a ball, place and brush 2 tablespoons of olive oil into your stone pot or on parchment paper, and place the dough in the center. Add 1 teaspoon of water and 1/4 teaspoon of oil in a small bowl (saucer), then lightly brush the top of the bread. If you’d like to score your bread, this is the time to do it. Place the lid over the pot and set it in your oven. Bake for 30 minutes.
- Once baked, remove the lid using heat-resistant oven mittens and bake for another 10 minutes. Afterward, remove the bread from the stone pot using proper heat-resistant mittens and place it on a cooling rack or cutting board for 20 minutes. Enjoy!
Notes
- When mixing in a stand mixer, your dough should start to pull away from the sides of the bowl. If you see the dough isn’t pulling from the sides of the bowl, add a pinch of flour until it does.
- Don’t over-flour your dough. Over-flouring your dough will create a dense texture.
- Place the dough into a well-oiled bowl and allow the dough to rest for a few hours. I usually place dough under the sun in a well-sealed, air-tight plastic wrap. Allow it to rest and do not touch while fermenting (I usually make my dough in the morning and allow it to sit all day until about 4:00 pm to start baking).
- When scoring dough, use a razor, knife, or the tip of a pair of scissors to make tiny cuts to give it a beautiful look. (optional)
- If you want to keep dough overnight, I recommend sealing it with plastic wrap, placing a towel over the top of the bowl, and placing the bowl into another bag. Place it into the fridge overnight. The next day, remove the dough from the fridge and allow it to sit for a few hours. Once the dough has come to room temperature, fermentation will continue until you are ready to bake.
- To achieve a crunchy outer layer, keep bread in the oven a few minutes longer to achieve a golden crust.
- Do not cut into the bread until it has cooled off.
- To get a more chewy texture, I tried using “Pizza Crust (fast and easy) Yeast,” and it also turned out great!
- (Note: Be very careful while using your stone pot, it gets very HOT! Make sure to use proper heat-resistant cooking mittens when handling your stone pot while baking.)
*** Our Nutrition information is estimated, so please make sure to check your own calculations to fit your diet.
- Prep Time: 4 hours
- Cook Time: 45 minutes
- Category: Bread
- Method: Baked
- Cuisine: American
⭐⭐⭐⭐⭐
WRITE US A REVIEW BELOW ⬇️
We would love to hear your thoughts if you tried out our recipe! 😊
Recipe Card


Can’t wait for the bread recipe. Looks scrumptious 😋😍🤗